
This post contains affiliate links. As an Amazon Associate we earn from qualifying purchases, at no extra cost to you.
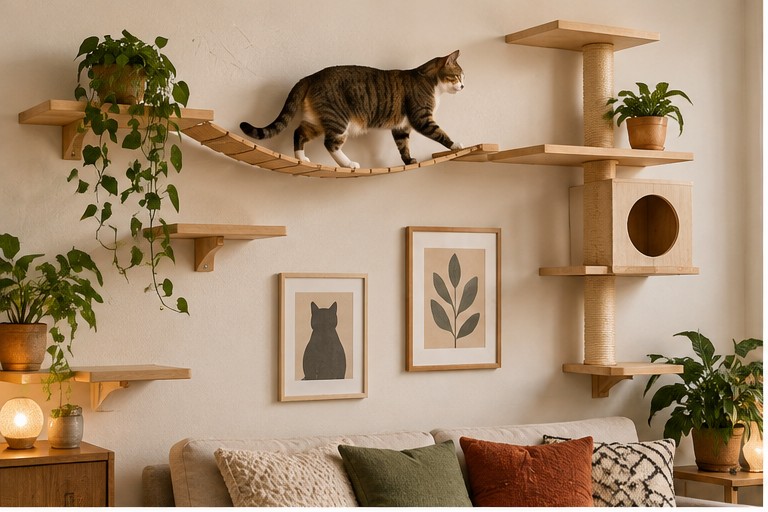
A “cat wall” sounds like a big project, but in a small apartment it’s usually 3-5 shelves and an afternoon of work. The part people actually get wrong isn’t the drilling — it’s the planning. Get the layout right on paper first, and the installation itself is quick.
This is the step-by-step version of what we’d tell a friend setting one up for the first time.
Step 1: Pick the Wall (Before You Pick the Shelves)
Look for a wall that:
- Gets used already — near a window, a favorite napping spot, or a piece of furniture your cat already climbs on
- Has at least one stud you can locate (an $8 stud finder pays for itself here)
- Isn’t directly above anything breakable, since cats do occasionally misjudge a landing
A wall near a window is the single best choice if you have one — the “destination” at the top (a view) is what makes cats actually use the route daily instead of ignoring it after week one.
Step 2: Sketch the Route Before Buying Anything
Grab a tape measure and rough out, in inches, a path from a low starting point (ideally something your cat can already reach — a low shelf, the arm of a couch) up to your end point.
Aim for:
- Vertical gaps of 12-18 inches between steps — close enough for an easy hop, far enough to actually cover ground
- 3 to 5 total steps/shelves for a typical apartment ceiling height
- A wider “landing” shelf at the top, since that’s where your cat will actually spend time, not just pass through
Sketching this first — even roughly — prevents the common mistake of buying a shelf set and then discovering the spacing doesn’t fit your wall.
Step 3: Choose Between a Kit and Individual Shelves
If this is your first cat wall, a connected “stair” kit is more forgiving — the spacing is pre-engineered, and you’re mounting one unit instead of coordinating several. See our wall-mounted cat shelves buying guide for how to evaluate specific options.
If your wall is an odd shape, has a window at an angle, or you want a longer route, individual modular shelves give you the flexibility a kit won’t.
Step 4: Confirm Weight Capacity for Your Actual Cat
Weigh your cat (or check their last vet visit weight) and make sure every shelf in your plan is rated well above that number — remember, a jumping cat exerts more force than their static body weight. If you have multiple cats who might share a shelf, size up.
Step 5: Find Your Studs and Mark Your Route
Use a stud finder to mark stud locations across your planned route. Where a shelf’s mounting points line up with a stud, great — that’s your strongest option. Where they don’t, use anchors rated for at least 2x the shelf’s stated weight capacity.
Mark each shelf’s position with painter’s tape before drilling anything — stand back and look at the spacing in person, not just on your tape-measure sketch. It’s much easier to move a piece of tape than to fill and repaint a hole.
Step 6: Install Low to High, Testing as You Go
Mount the lowest shelf first and let your cat find it before you move on — this also lets you double check the height feels right in person before committing to the next one’s position.
Work your way up, checking that each new step isn’t too big a jump from the last. If your cat hesitates at a gap, that’s useful information — it usually means the vertical distance is a bit much, and worth closing before you finish the top of the route.
Step 7: Give It Two Weeks Before Judging It
Some cats use a new climbing route within minutes. Others take a couple of weeks to trust it, especially if they’re naturally cautious. Placing a treat or a bit of catnip on the lower shelves for the first few days speeds this up meaningfully.
Common Mistakes to Avoid
- Starting the first shelf too high off the floor. If your cat can’t comfortably reach step one, the whole route goes unused.
- Making the top shelf too narrow. The end point should be a place to actually lie down, not just balance.
- Ignoring the “destination.” A route that just dead-ends at a blank wall gets used far less than one that ends at a window.
- Skipping the stud finder. Anchors alone can work, but only if they’re properly rated — don’t eyeball this one.
What You’ll Need
- Stud finder
- Tape measure and painter’s tape (for marking before drilling)
- Level
- Drill and appropriate anchors/screws (check what’s included with your specific shelf set)
- The shelves themselves — see our buying guide if you haven’t chosen yet
Frequently Asked Questions
How long does installing a full cat wall system actually take?
For a 3-5 shelf route, plan on 2-4 hours including planning time, spread across one afternoon or a weekend if you want to test spacing between steps.
What if my cat won’t use it at first?
Give it two weeks, use treats or catnip on the lower shelves, and make sure the first step isn’t too high or too big a jump from a spot your cat already frequents.
Can I install this without drilling into studs?
Yes, with properly rated anchors, but studs are always the stronger option where available — worth the extra planning time to line up at least the lower, most-used shelves with a stud.
Ready to pick your shelves? See our Best Wall-Mounted Cat Shelves for Small Apartments buying guide for specific recommendations by budget and wall type.
1 comment